Fabric Discovery
Fabric Discovery is the process of discovering all the Leaf and Spine switches in the fabric. This sounds fairly straightforward and it is. But before you can start Fabric Discovery you have to perform the APIC setup first.
APIC setup
When you first unbox an APIC you will have a UCS server. It will have several interfaces on the backside. At one of the interfaces there should be a label To Fabric. Depending on the VIC adapter that is installed in the UCS it has two or four interfaces. If you have the one with four interfaces, connect your fabric cables in port 1 and 3. This is because the APIC is using ports 1 and 2 as its eth 2-1 and ports 3 and 4 are eth 2-2.
Furthermore you should see RJ45 connectors with the labels eth1-1 and eth 1-2. These are the Out of Band management ports. You should connect these redundantly to a special management network. To the right of those two ports you see another two. One called ‘M’ and another one called 10101. These are the CIMC and console ports respectively.
When connecting an APIC in a production network I would advice you to connect all interfaces (except ports 2 and 4 on the VIC). You could choose not to connect the console port if you connect the CIMC port as the CIMC has built-in KVM possibilities and Console over Ethernet.

The ports labeled ‘To Fabric’ must be connected to Leaf switches. I would advice you to connect them to two different leaf switches and to connect your other APICs to yet other pairs of leaf switches. You can connect them all to a single (pair), but that would not be smart for redundancy.
Know that you need to configure the CIMC to be able to use it. You need to configure an IP address. It is also recommended to install the version of the CIMC bios that is recommended for the ACI version you’re planning on running.
Ok, so now we’ve racked and cabled the APIC and we’ve configured the CIMC. What’s next?
Now you can boot up your APIC. It will present you with a setup wizard. To be able to finish the wizard you need to have thought of some parameters to configure. You’ll need the following:
- Fabric Name: A name for the fabric.
- Fabric ID: The identifier for the fabric. When running multiple fabrics they should have different ID’s
- Number of active controllers: The number is dependent on the size of the fabric. Sizes differ between versions, but most of the time it’s either 3 or 5 controllers.
- POD ID: In case of a multi-pod fabric each POD has its own identifier. The number here is the POD Identifier of the POD on which the APIC will be connected.
- Standby Controller: Whether this controller will be a standby controller or not. A standby controller is a controller which is not actively member of the cluster, but can be easily added to the cluster in case one of the actual members fails.
- APIC-X: Whether this APIC is configured as an APIC-X. APIC-X is deprecated and should no longer be used. It might not even be asked on the version you’re installing.
- Controller ID: The Identifier of the controller. Can be anything in the range of 1 to 32.
- Controller Name: The name of the APIC controller
- TEP ip address pool: The TEP IP address pool is the pool of IP addresses from which the fabric pulls addresses to assign to LEAF switches for tunnel endpoints. The minimum size (as of version 2.0 is a /22. Recommended size is a /16. These addresses are internal to the fabric unless they’re routed out using some extension protocol. Therefore it’s recommended to use unique addresses for this.
- Vlan for infrastructure network: This is the vlan used for APIC to switch communication, including virtual switches in ESX. This vlan is not allowed to be used anywhere else in the environment.
- IP pool for BD multicast (GIPo): These multicast addresses are used to send BUM traffic to all intended recipients. The prefix is required to be a /15. By default this is configured to be 225.0.0.0/15
- Management network configuration: The IP address, subnet mask and gateway of your out of band network. This is required for the APIC to be reachable. You can also configure IPv6, but that’s not required.
Below is an example of the APIC wizard. You’ll see some values in brackets. Those are the defaults. If you accept the defaults you can just press enter. You don’t need to enter the answer to the question in that case.
Cluster configuration ...
  Enter the fabric name [ACI Fabric1]: NetWorkout
  Enter the fabric ID (1-128) [1]: 1
  Enter the number of active controllers in the fabric (1-9) [3]: 1
  Enter the POD ID (1-9) [1]: 1
  Is this a standby controller? [NO]: No

  Enter the controller ID (1-3) [1]: 1
  Enter the controller name [apic1]: nwo-apic1
  Enter address pool for TEP addresses [10.11.0.0/16]:
  Note: The infra VLAN ID should not be used elsewhere in your environment
        and should not overlap with any other reserved VLANs on other platforms.
  Enter the VLAN ID for infra network (2-4094): 4
  Enter address pool for BD multicast addresses (GIPO) [225.0.0.0/15]:
Out-of-band management configuration ...
  Enable IPv6 for Out of Band Mgmt Interface? [N]:
  Enter the IPv4 address [192.168.10.1/24]: 192.168.2.80/24
  Enter the IPv4 address of the default gateway [None]: 192.168.2.254
  Enter the interface speed/duplex mode [auto]:
admin user configuration ...
  Enable strong passwords? [Y]:
  Enter the password for admin:
Reenter the password for admin:
Cluster configuration ...
  Fabric name: NetworkOut
  Fabric ID: 1
  Number of controllers: 1
  Controller name: nwo-apic1
  POD ID: 1
  Controller ID: 1
  TEP address pool: 10.11.0.0/16
  Infra VLAN ID: 4
  Multicast address pool: 225.0.0.0/15
Out-of-band management configuration ...
  Management IP address: 192.168.2.80/24
  Default gateway: 192.168.2.254
  Interface speed/duplex mode: auto
admin user configuration ...
  Strong Passwords: Y
  User name: admin
  Password: ********
The above configuration will be applied ...
Warning: TEP address pool, Infra VLAN ID and Multicast address pool
         cannot be changed later, these are permanent until the
         fabric is wiped.
Would you like to edit the configuration? (y/n) [n]:
Now the APIC is installed and will boot. After a few minutes you should be able to access the APIC on the IP address you specified (use https). After you’ve connected to the APIC you’ll be presented with the normal GUI screen. Since you don’t have done any fabric discovery yet, this APIC will be alone and will tell you that the cluster is not operational.
Fabric discovery
When you log in to the APIC you will see the GUI fairly empty, except for a few faults. Don’t mind those faults for now, they will probably disappear. If you still have faults after discovering the fabric look into them as they might be something you need to fix.
As you have read in the ACI Object Model chapter the policy model defines that a switch needs to be incorporated into the model before it can be used. Fabric Discovery is the process of incorporating switches into the model.
For this to work a few things need to happen:
- The switch needs to be discovered by the fabric
- The fabric must be told to make this switch part of it and what to call it.
- The Object model must be installed on the switch
When you configured the first APIC it started the process of discovery. This is fairly simple. It just starts using LLDP to discover its uplink switch(es). All Nexus 9k switches in ACI mode have LLDP enabled by default when they come out of the box. Using LLDP the APIC will find the switch it is connected to. This switch will be listed on the Fabric, Inventory, Fabric Membership, Nodes Pending Registration page.
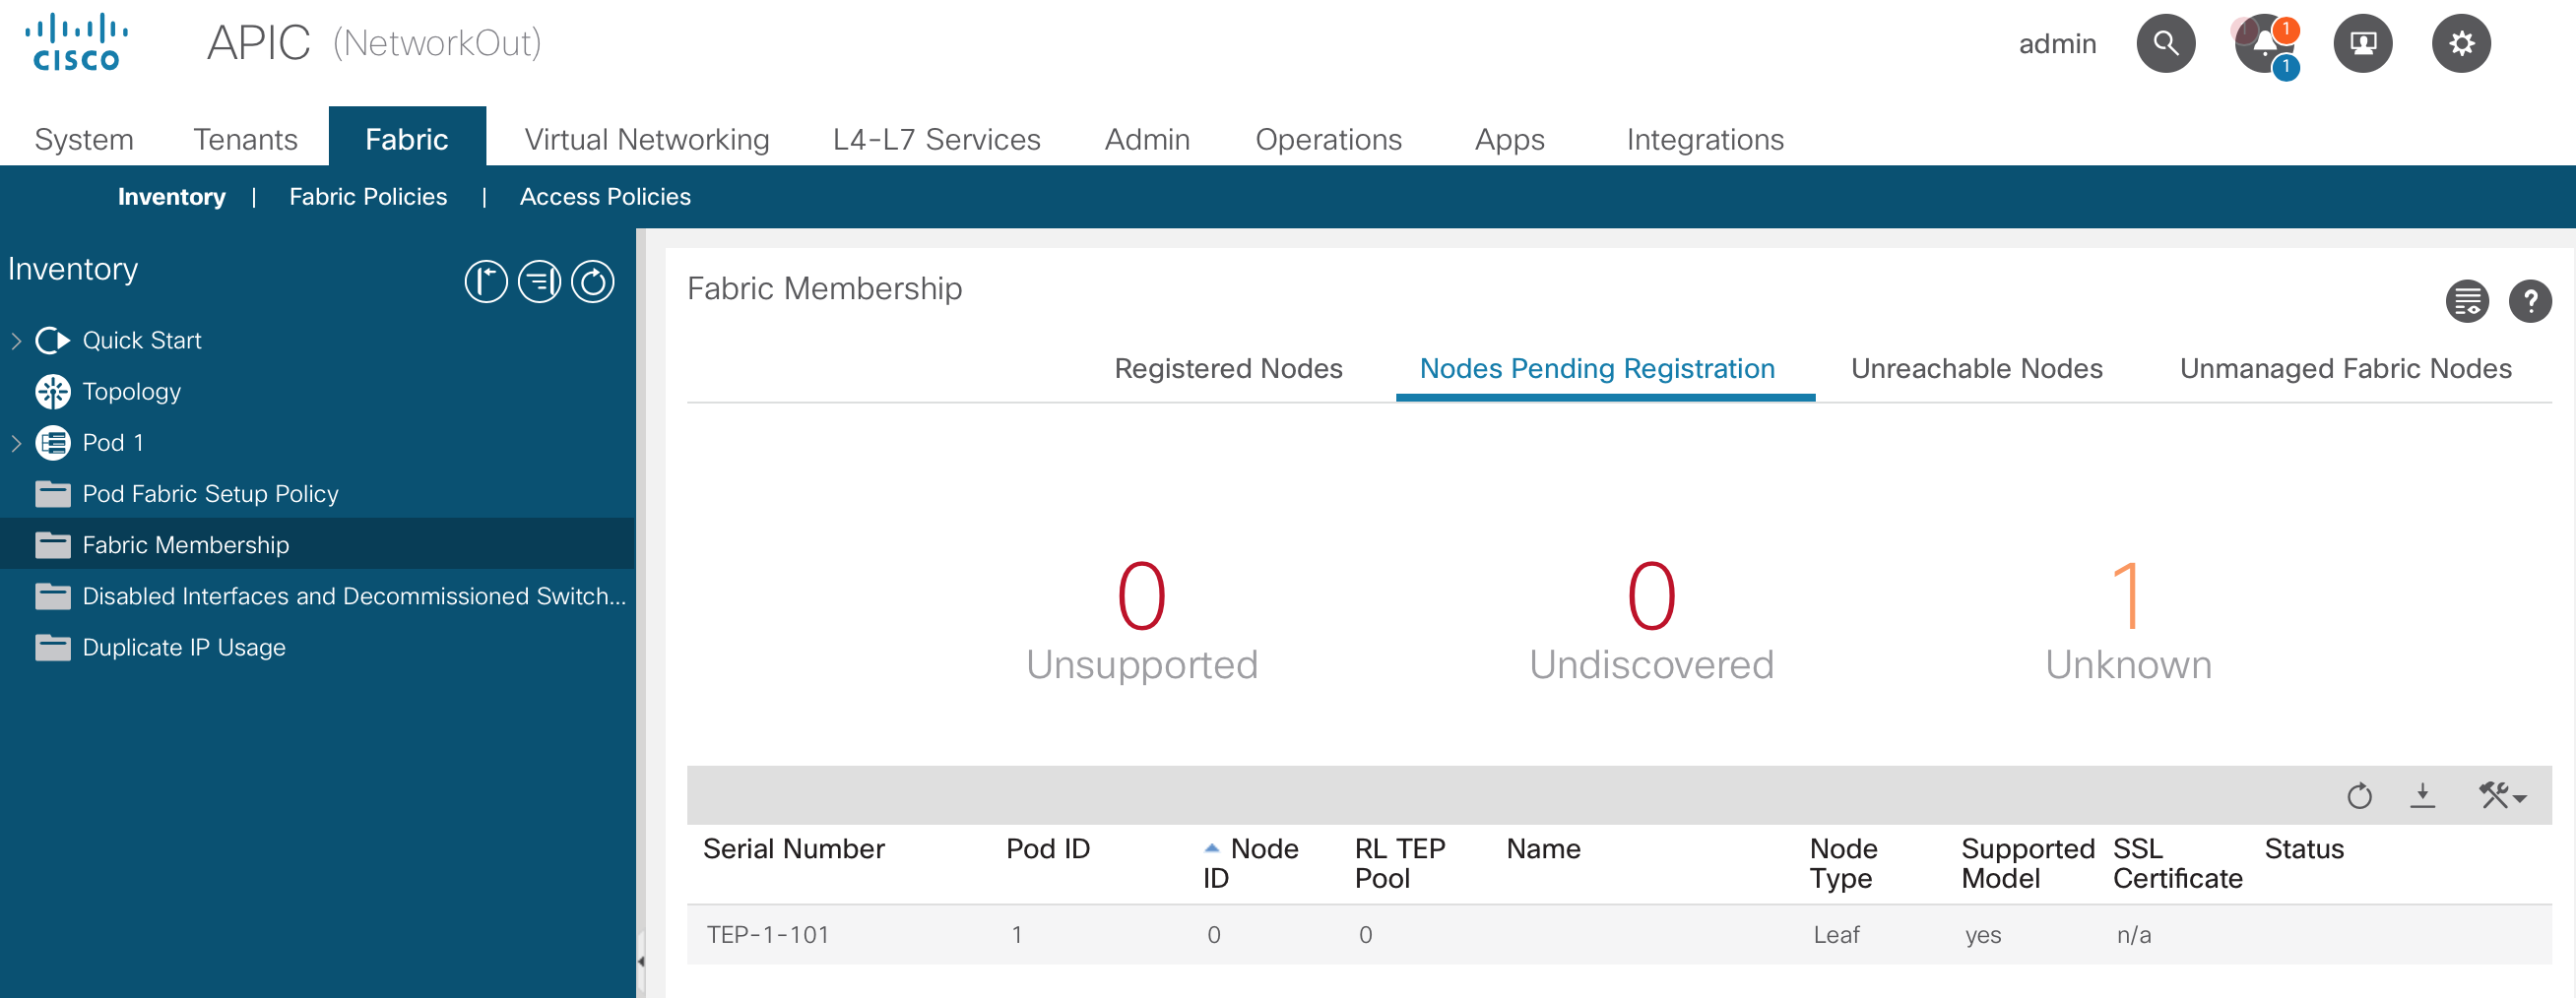
Here you can see the serial number, Pod ID, Node ID, Node type and more information. You can see the same information on the CLI of the APIC using the acidiag fnvread command:
nwo-apic1# acidiag fnvread
      ID   Pod ID                 Name    Serial Number         IP Address    Role        State   LastUpdMsgId
--------------------------------------------------------------------------------------------------------------
       0        0                             TEP-1-101            0.0.0.0 unknown        unknown   0

Total 1 nodes
I’m using the ACI simulator for these screenshots, so the Serial Number is a bit weird.
To register the switch into the fabric you have to specify some information:
- Pod ID: The number of the POD the switch will be part of. Defaults to 1 and only needs to be changed in the case of a multi-pod environment.
- Node ID: A unique number specifying the node. This number can be anything between 101 and 4000. It is recommended to have a numbering scheme for Spine and leaf switches. For example 101 - 199 for Spine switches, and 201 - 299 for Leaf switches. The numbers don’t have to be consecutive.
- Node Name: The human readable identifier of the switch. I would recommend to include the node number in the name, but this is not required.
- Role: The role of the switch. This can be:
- Spine
- Leaf
- Virtual Leaf
- Virtual Spine
- Remote Leaf
- Tier 2 Leaf (as of version 4.1)
- Rack name: Optional information about the location of the switch.
As soon as you’ve registered the first leaf switch it will assigned an IP address by the APIC. After a basic configuration by the APIC it can be used to continue the discovery. The leaf switch will detect its connected spines and those will detect the leaf switches after they’ve been registered.
This process continues as long as there are switches to discover.
A spine switch without leaf switches connected to it won’t be discovered. This sounds logical as you wouldn’t have LLDP to discover it. But in case of a multi-pod setup the first spine is discovered due to its connection to the Inter Pod Network. If it does not have a leaf connected (and powered on) it will not be detected. (I discovered this the hard way)
nwo-apic1# acidiag fnvread
      ID   Pod ID                 Name    Serial Number         IP Address    Role        State   LastUpdMsgId
--------------------------------------------------------------------------------------------------------------
     101        1            NWO-SP101        TEP-1-103       10.0.8.65/32   spine         active   0
     201        1            NWO-LF201        TEP-1-101       10.0.8.64/32    leaf         active   0
     202        1            NWO-LF202        TEP-1-102       10.0.8.66/32    leaf         active   0

Total 3 nodes
Graceful Insertion and Removal
GIR allows isolation of a switch from the network with minimal service disruption. GIR is also called maintenance mode.
Maintenance mode allows you to remove a switch from the forwarding path. When performing GIR the switch gracefully shuts down all external protocols with the exception of IS-IS (which is required for the switch to be able to communicate with the SPINES and APICs and advertises the maximum IS-IS metric). All non fabric ports on the switch are shut down. The following protocols are supported for the graceful shutdown of processes:
- BGP
- EIGRP
- IS-IS
- OSPF
- LACP
When disabling maintenance mode (graceful insertion) the switch is automatically decommissioned, rebooted and recommissioned. After the switch is back online the all protocols are re-enabled. The IS-IS metric is lowered back to the default after 10 minutes.
- Upgrading or downgrading a switch in maintenance mode is not supported
- If the fabric links go down while in maintenance mode, the switch needs to be manually rebooted (using
acidiag touch clean.), decommissioned and recommissioned - When using multi-pod the IS-IS metric for redistributed routes should be set to a value lower than 63 (which is the default)
The command to put a switch in (or out of) maintenance mode is: [no] debug-switch <node-id|node-name>. You can also enable Maintenance mode from the GUI by right clicking the node and selecting Maintenance.
Wiping your fabric
You might encounter a situation in which you need to wipe a switch or maybe even an APIC.
Wiping a switch
The easiest way to wipe a switch is from the GUI. At Fabric, Inventory, Fabric Membership. Right click on the switch you want to wipe and click ‘Remove from controller’. This will erase the configuration of the switch and reboot it. After the reboot it can be discovered again.
Another way is using the CLI on the switch and issuing the following command: setup-clean-config.sh followed by a reload.
Wiping an APIC
Issue the following commands:
Acidiag touch clean
Acidiag touch setup
Acidiag reboot
After these commands and the reboot of the APIC you’ll be presented with the original APIC setup script again.